How to install thermoplastic markings

If you have experience in road or playground marking, you will find our thermoplastic markings easy and quick to install. If you don’t have any experience, don’t worry! Our easy-to-follow step by step guide is below to help you, though we do recommend you undertake some training prior to attempting it.

  1. First, the area where the new markings are going will need to be cleaned. This means getting rid of any debris. Most surfaces will only require a thorough sweep with a stiff-bristled brush, but for larger areas a power sweeper is useful. A Stihl MM56 with a brush attachment is an effective combination for this. If the area is particularly dirty you may want to jet wash it first. If you do, ensure it is completely dry before installing the new markings.

2. Next, mark out the design using a string line and chalk – the measurements will be provided on a specification sheet for each game. This is made easier with two people.

3. Prime the area with a roller where the new marking is going and wait for it to dry. This usually takes around 10 minutes. If the tarmac is less than 1 year old you can skip this step. 

4. Next, lay out the new markings on the ground, making sure it’s exactly as per the specification sheet.

Thermoplastic lines will be supplied pre-cut, either in 1m strips or 5m rolls, and are flexible enough to ensure they follow your chalk line perfectly.

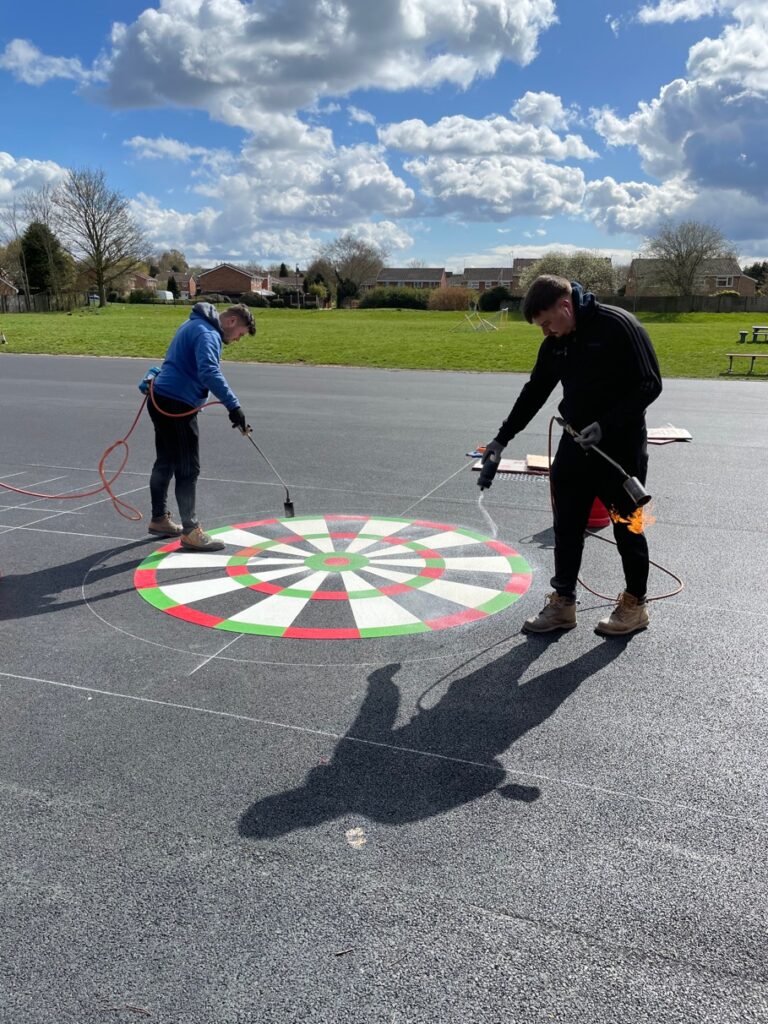
If your markings include any curved lines (for example, the Ds on sports courts), we will provide 1m strips which are designed to be flexible enough to create any curved shapes. Put the strip face down onto the ground and very lightly heat the back of it. Flip it back over before it cools and you will be able to easily bend this into any shape.

5. Heat the marking until it is molten to create a bond to the surface. This step requires extra care to be taken as if you heat the marking too much, it will burn. Similarly, if the marking isn’t heated enough, it won’t form a sufficient bond with the tarmac and the marking will fail.

Use a bottle of propane gas and a heating torch to heat the markings. It’s best to keep the tip of the torch at a distance of 20-30cm from the marking, moving the heat back and forth until it is molten. 

A good way of telling if the marking has been heated enough is you should see the edges of the marking start to roll out a couple of millimetres wider than it was originally. The top should also start to bubble like cheese on toast!

6. The thermoplastic material we use has a built-in, anti-slip glass bead. When melted to the surface, the bead sinks into the material so it is slip resistant throughout the duration of its lifespan. 

To give it some initial slip resistance you will need to add on some additional glass bead to the top of the markings. Sprinkle this on around 20-30 seconds after you have finished heating it. The marking needs to be molten enough that the glass sinks into the very top layer of the material. If you sprinkle it too quickly, the marking will be too hot and the glass will sink too far into the material, making it ineffective. Equally, if you wait too long to sprinkle it, the marking will have cooled too much and the glass bead will only sit on top, blowing away with the next gust of wind. This step should be repeated between heating each section of the marking.

Important things to remember:

  • New tarmac needs 6-8 weeks to settle before installing new markings onto it.
  • New markings should not be installed directly over old thermoplastic markings. This is to ensure the new markings can bond to the tarmac. If you require removal of existing markings, let us know and we can put you in touch with our sister company – TPMR – who can vapour blast existing markings off. 
  • If the tarmac surface is less than a year old, you do not need to use a primer.

We’re more than happy to provide advice and support if you have any questions about the installation process. Give our friendly team a call on 0800 0621 4242.